Payment Terms
A Payment Term helps to set a schedule according to which payments will be made.
A Payment Term defines a specific payment slab. For example, 50% payment on shipping and 50% on delivery of the item. You can save your business's payment terms on TechoERP and include them in all documents in the sales/purchase cycle. TechoERP will make all the General Ledger entries accordingly.
In TechoERP, the Payment Terms form only defines portion percentages. The actual payment schedule can easily be applied using the Payment Terms Template.
You can use Payment Terms in the following documents:
- Sales Invoice
- Purchase Invoice
- Sales Order
- Purchase Order
- Quotation
To access Payment Term go to:
Home > Accounting > Accounting Masters > Payment Term

1. How to create a Payment Term
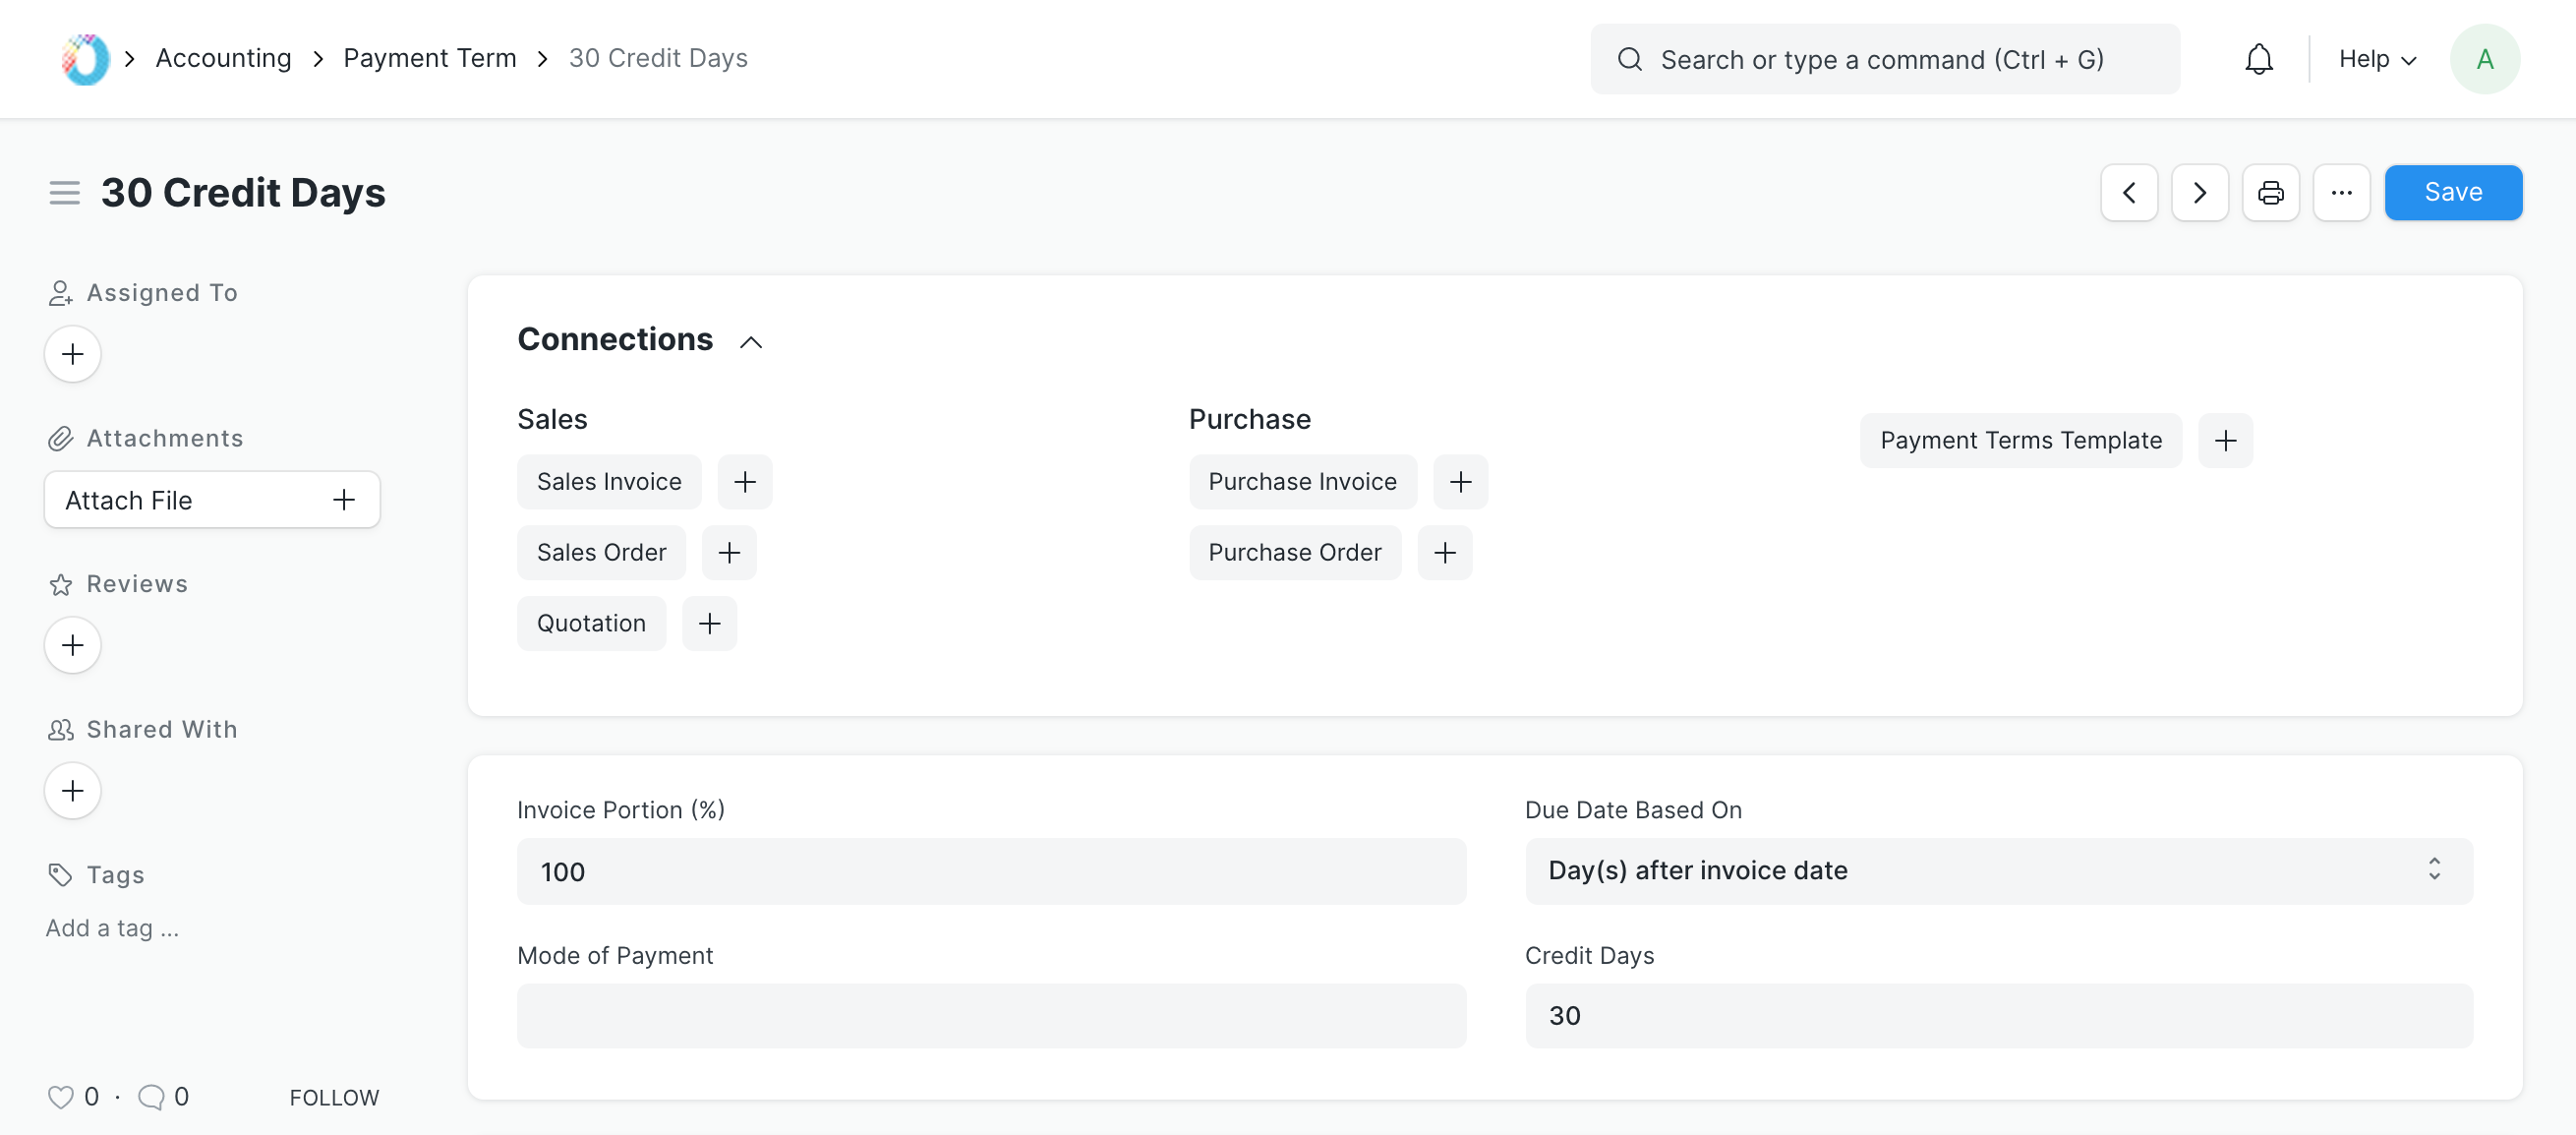
- Go to the Payment Term list and click on New.
- Enter a name for the Payment Term (eg: 50% post-shipment).
- Enter the Invoice portion. If you enter 50, the portion will be 50 percent of the Invoice amount.
- Select a Due Date type.
- Under Credit Days enter the number of days after which the remaining amount has to be paid.
- Save.
The fields are explained as follows:
- Payment Term Name: The name for this Payment Term.
- Due Date Based On: The basis by which the due date for the Payment Term is to be calculated. This is calculated X number of days from the posting date of the invoice/order. There are three options:
- Day(s) after invoice date: Due date should be calculated in days concerning the posting date of the invoice. For example, if 7 is entered on date 20th, the due date will be 27.
- Day(s) after the end of the invoice month: Due date should be calculated in days concerning the last day of the month in which the invoice was created. For example, if 7 is entered in the current month and the last day of the month is 30th, the due date will be the 7th of the next month.
- Month(s) after the end of the invoice month: Due date should be calculated in months concerning the last day of the month in which the invoice was created. For example, if 3 is entered on the 20th of January, the due date will be on 20th March.
- Invoice Portion: The portion of the total invoice amount for which this Payment Term should be applied. The value given will be regarded as percentage i.e 50 = 50% of the invoice/orders Grand Total
- Credit Days (optional): The number of days or month credit is allowed depending on the option chosen in the Due Date Based On the field. 0 means no credit allowed.
- Description: (optional) A brief description of the Payment Term.
1.1 Setting up Discount on Early Payments
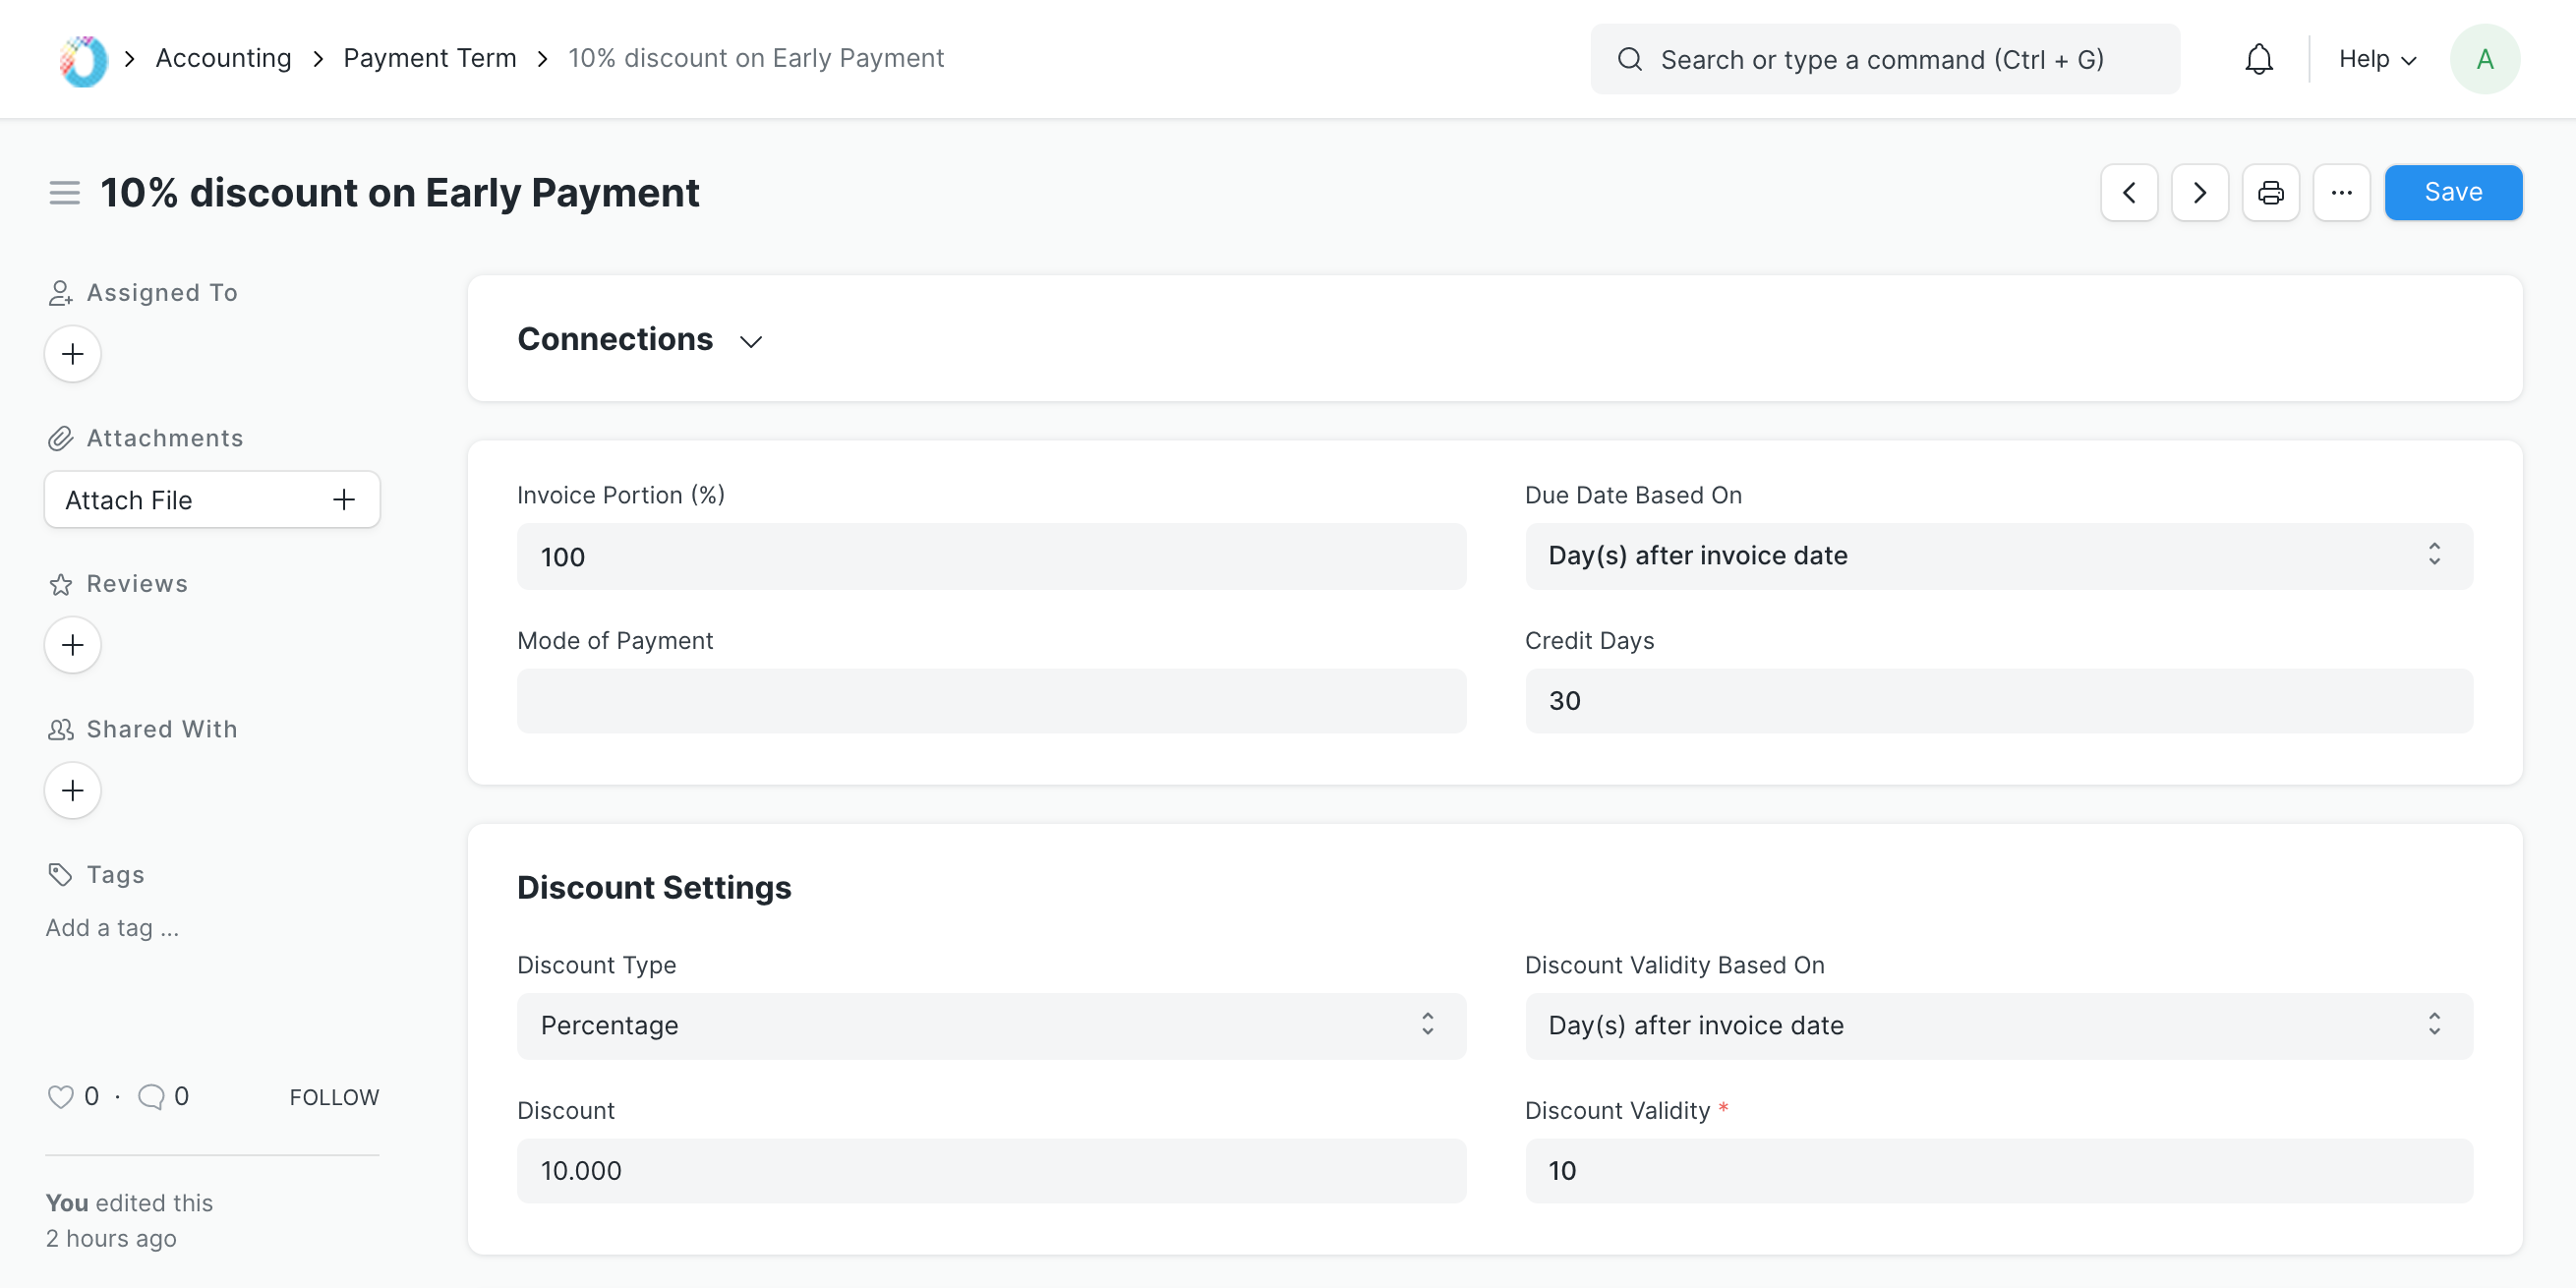
You can set up a discounted payment terms such that if payment is done within the specified period then some amount/percentage of the invoice value will be discounted. The following fields define the discount configuration:
- Discount Type: Default is Percentage. You can also change it to Amount.
- Discount: In terms of Percentage or Amount (eg. 10% or ₹ 5,000).
- Discount Validity Based On: This field acts similar to the Due Date Based On the field in the previous section.
- Discount Validity: The number of days or months the discount is valid with respect to the invoice date (eg. 10 days after the invoice date).

You can now link the Payment Terms with an Invoice and on creating the payment against such invoice, the discount will be applied automatically.
1.2 Payment Terms in Converted Documents
When converting or copying documents in the sales/purchase cycle, the attached Payment Term(s) will be copied. When creating a Sales Order from a Quotation, the Due Date in the Payment Terms will be according to the Quotation, this needs to be updated.
For ease of use, you can also set a Payment Terms Template and simply reselect it.
1.3 Adding Payment Terms To Documents
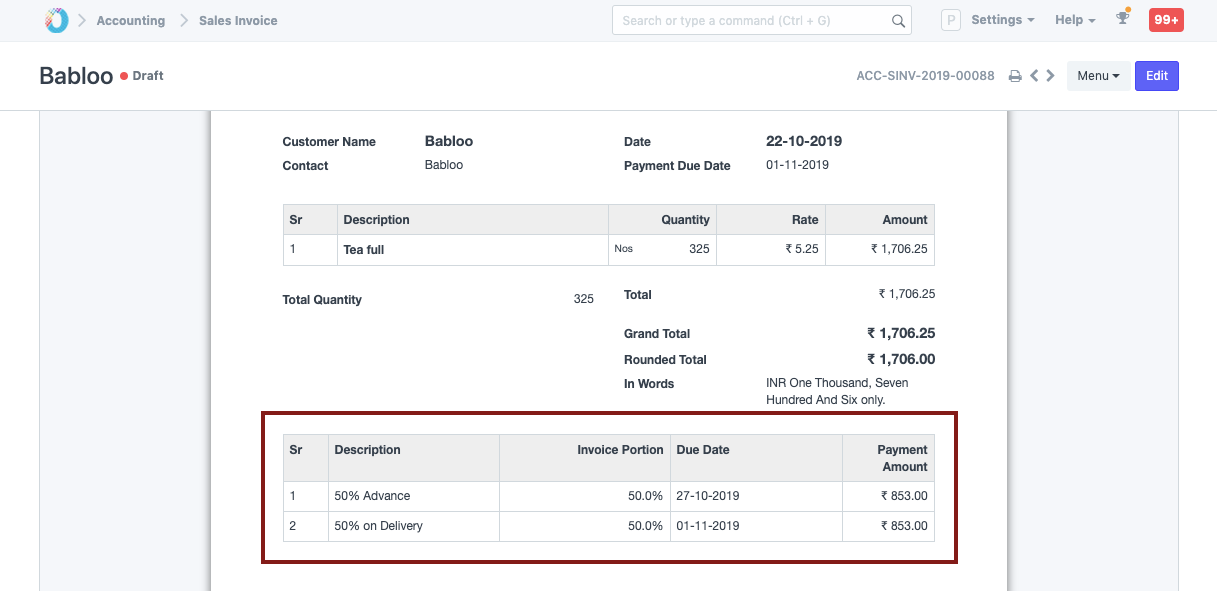
Once you have composed the Payment Terms Template, you can use them in sales and purchase transactions. Based on the value defined for Payment Terms and transaction value, the payment schedule will be defined, with a Due Date for each payment slab.

Note: The Payment Schedule can be shown in the Print View using the Print Format Builder.